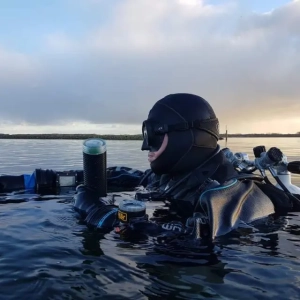
All about Gramper GPS
The GramperGPS buoy enables the logging of underwater GPS positions without the need to surface. Charting your local dive place, exploring or participating in a project dive, it’s all possible.
The buoy is designed by and for divers and excels in simplicity. Insert SDcard, switch on the power and close the buoy, you’re good to go now!
The GramperGPS buoy is a self-contained, very simple GPS datalogger designed to log GPS positions from underwater.
It is launched much the same way as a SMB and, once at the surface, will log GPS positions to a MicroSD card for later processing.
No, you cannot navigate with the GramperGPS as the buoy will only log positions at the surface. It does not contain a display or something simlar to show you the way.
For underwater navigation, you’ll need to look for other solutions.
That’s very easy, just follow these simple steps:
- Assemble the buoy on the surface, that means, insert battery and microSD card, switch on the GramperGPS and put the electronics in the buoy
- Screw the transparent lid on the buoy, making sure the thread is catching straight. Screw on tight but do not overtighten.
- Put the buoy aside with access to clear skies so it can get its initial positions. The GramperGPS will blink red during this period.
- As the “Cold-fix” can take some time, don your divegear, set-up your equipment and make ready to enter the water.
- Make sure to take the small magnet with you, e.g. in your pinky finger of your (dry)glove.
- By now, the GramperGPS will blink green, indicating it has acquired and logged its position and is ready for use.
- Attach a reel or spool to the buoy and enter the water.
- At a position you want to log, use a small magnet on the Lid to activate the position logger, the LED will turn from blinking green to blinking red.
- Launch the buoy as you would an SMB
- After 30 – 60 seconds, retrieve the buoy and observe the LED, if it blinks green, job’s done! If it blinks red, relaunch the buoy and wait a bit longer.
- After retrieval of the buoy, swim to the next position and start from position 8.
- After the dive, unscrew the lid, remove the electronics and switch off the buoy, you can now remove the microSD card and use any program you want to process the data.
- Don’t forget to recharge the battery every now and then!
The GramperGPS logs date, time, latitude, longitude and, if it is able, course and speed. It will also log the HDOP value and number/quality of satellites.
You can use any text editor, MS Excel, Notepad++ or similar to load the .CSV files from the microSD card.
You can use https://www.gpsvisualizer.com/ to convert a CSV file to a number of known file formats for use in Google Earth, Leaflet map, GPX and so on.
Remember, the GramperGPS logs each position into its own file.
The buoy is made of PVC tube used in high-pressure water piping. It’s stated for 100 meter depth although we won’t recommend that.
As far as accuracy of the logged positions go, it’s depended on currents, so releasing the buoy from, say, 60 meters, will give you a greater inaccuracy as when launching from a shallower depth.
